
The kitchen is progressing! We now have my dream backsplash: white 3x6 subway tile with light gray grout. This tutorial will be for the installation of the tile. I'll do a separate post for grouting.
Supplies needed:
- mastic (I used TEC Type-1 Mastic $13.98 for 1 gallon. We used 1 gallon and 1 quart for the whole project).
- notched trowel
- level
- tile spacers (I used 1/8" TAVY spacers $4.98 for 100. You don't have to use spacers. Most subway tiles have built in spacers. I opted for a larger gap).
- subway tiles (I used 3x6 American Olean white ceramic non-beveled. 22¢ each)
- pencil
- measuring tape
- sheetrock mud pan
- wet saw (I'll get to that later)
- flat head screw driver
- Sharpie® to mark your cuts
- trim pieces (I opted for a metal trim instead of tile. One piece covered me for the whole project).
- damp rag


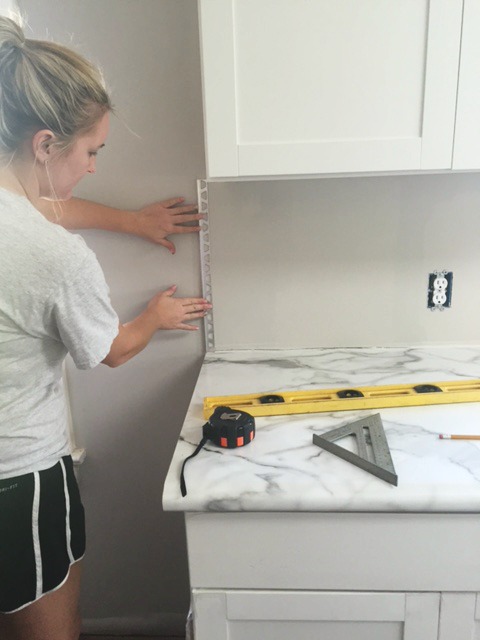
1. Find a starting point. Since I was new to tiling, I opted for the smaller wall first. I started from the corner on the sink wall. I worked off the counter as my base line. Make sure your counter is level if you are going to do it this way. Then, I marked the vertical line using the level. *Be sure to check level throughout the process. You don't want to start going downhill or uphill. It will be noticeable.
2. After I had my vertical level line marked, I measured the height for my vertical trim. Using a handheld grinder, we cut the trim to fit, smoothing any sharp edges.
3. Scoop a good sized dollop of mastic into your pan. Be sure to seal your bucket of mastic as soon as possible. You'd be surprised how fast that stuff dries out!
4. Using your trowel, get a generous scoop of mastic from the pan. Apply the mastic to the wall being sure to leave the trowel indention. I found it easiest to hold the trowel at a 45° angle. **Only apply enough mastic for 2 or 3 tiles. Work in a very small area to keep your mastic moist.**
I only applied enough mastic to stick the trim to first. Once the trim was glued and level, I applied the mastic over the lip. Only the thin metal edge will be visible. The tile sandwiches the trim to the wall, securing it.

5. After the mastic is on the wall, "back butter" your tile. I'm not sure if that is the correct terminology, but in the south, we know how to butter bread. :) Put a generous amount, but not so much that it will squeeze out around the edges.

6. Press the tile firmly to the mastic on the wall. Use your tile spacers as you apply each tile. Don't apply a few and go back to wiggle the spacers in. We did this and moving the tiles broke the "bond" and they fell off.... YIKES! Lesson learned. *If mastic seeps out around the edges, use your flat head screwdriver to remove it. Any mastic in-between the tiles will affect your grout.*

Apply a spacer in each joint to keep the tiles evenly spaced.

7. Measure the tiles to cut. Take into consideration your spacers. Mark with a Sharpie® or other permanent marker.

**As I stated in the "supplies needed" section, you need a wet saw. Lowe's told me when I was purchasing my tiles that if we marked our tiles, they would cut with their wet saw for 25¢ per cut. We marked our tiles and took them to Lowe's. What the guy failed to tell me is they only do 10 cuts per trip... ?!? I sweet talked him into cutting the tiles we brought since we live 20 minutes away. I think we had 11 tiles, but way more than 10 cuts. We knew that we would need more cuts on the other wall, so Dad had a brilliant idea. Here's your Redneck 101 lesson for today, but it's genius! We bought a diamond blade (DEWALT® 4" Wet or Dry Continuous Diamond Circular Saw Blade $24.99) for the grinder (similar here) and a spray bottle. I squirted (a lot) of water on the blade of the saw while Dad cut. PERFECTION! We should probably patent that...Redneck Wet Saw. :) So glad we did because we had to re-cut everything the Lowe's associate had cut for us...grrrr
Back to the tutorial... I continued to install what I could while the tiles were being cut. Yes, I did tile vertically before the horizontal was complete. I wouldn't recommend that, but it was such a small area that it didn't affect anything. If you tile vertically before your horizontal is complete, it can cause sagging tiles since they have nothing to rest on.

8. Allow 24 hours for the mastic to dry. The mastic must dry before you remove the spacers and before you can grout.
Here is the sink wall waiting on grout:

If you do not have a counter top to work off of, screw a piece of wood as your baseline. (Make sure it is level). We had to do this on the stove wall (you can see it in the photo below). The vertical line we worked from was center of the stove/hood. We made sure all of our tiles were center with that line from the bottom all the way to the ceiling.
We had to rework some of the wiring for the stove hood. We also removed a rectangle of the sheetrock to install a horizontal stud for the hood. We put the sheetrock back and put the screws where they would need to be for the hood. We determined it would be easiest to cut and tile around the screws then trying to drill through the tile.

Here is the stove wall tiled and waiting on grout.

Stay tuned for Installing Subway Tile Part 2: Grout!!

No comments:
Post a Comment